
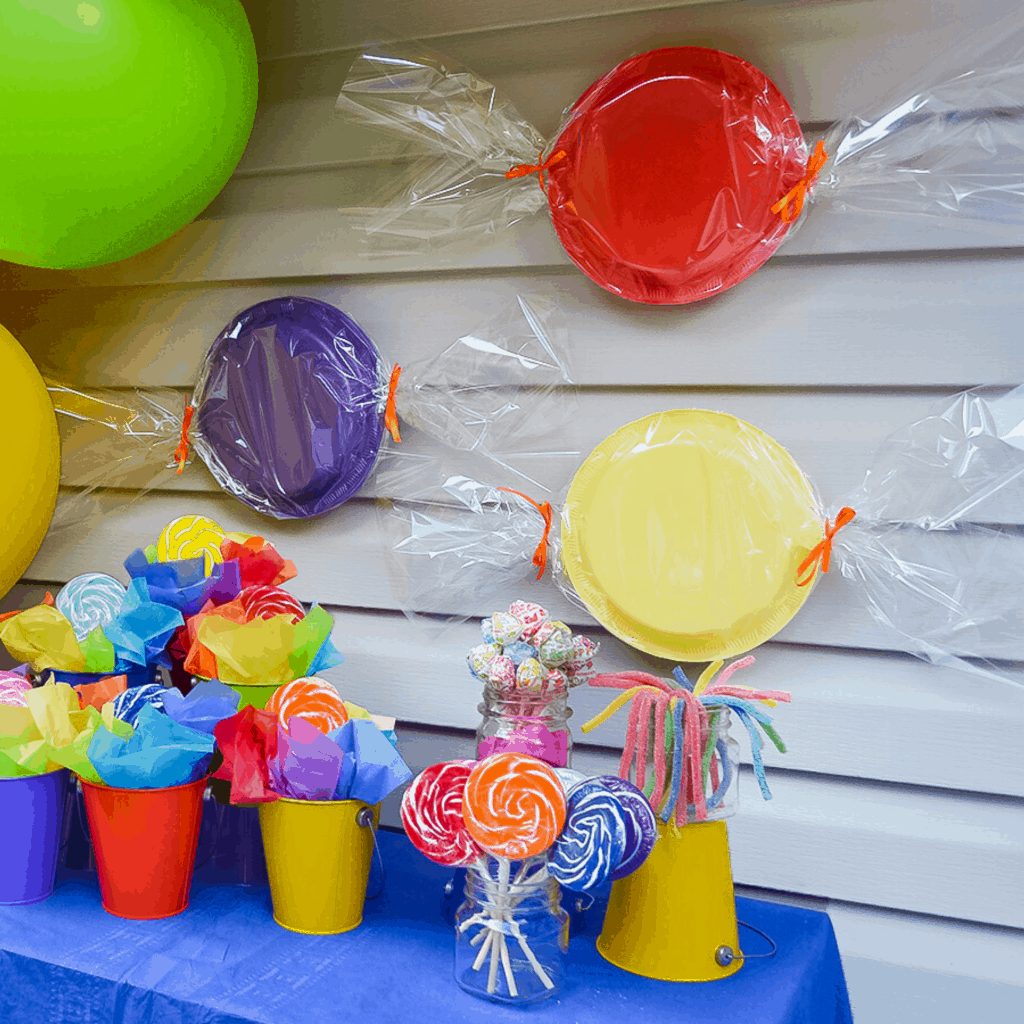
Candy Decoration Ideas for Your Next Party
After being home for what feels like FOREVER, I have been tempted to minimize family celebrations. But now that my son’s birthday is right around the corner I just didn’t want him to think that his day was any less special this year. Because it’s not! There will still be cake, there will still be balloons, and there will still be fun. So in honor of his love for candy, we’re putting together a really small but “sweet” celebration. In this post I’ll show you how to make super simple DIY candy themed party decorations. There are wall decorations that double as plates for birthday cake and lollipop centerpieces that can easily become your party favors at the end of your get together!
There are so many pretty colors you can go with for a DIY candy themed party, but since this is for my little guy I’m steering away from pastels. Primary and secondary colors are perfect for this and easy to find pretty much all the supplies you need in the right colors. Also, is there anything happier than bright colors?
I shopped mainly at Party City, but was able to find many similar items at the Dollar Tree.
Candy Themed Wall Decorations
What you’ll need:
- Disposable plastic plates
- Roll of clear cello wrap
- Tape
- Ribbon or clear elastics


Assembling Your Candy Decoration
Take 2 of your plastic plates and flip one over so that the edges are touching and they create a 3D candy shape. You can glue them together if you’d like, but they seemed to line up fine without it. The cello wrap and ribbon will hold them in place.
Next you’ll need to cut a piece of cello wrap big enough to wrap the plate like a present. One piece of tape should be all you need.
Then just gather the excess on each end and secure with some ribbon. You could use clear elastics if you want the true look of a hard candy in a wrapper.
Candy Themed Table Decorations/Favors
What You’ll Need:
- Metal Buckets
- Styrofoam Cups (slightly smaller than bucket)
- Rainbow Tissue Paper
- Swirly Lollipops
- A Skewer or Scissors


Everything in these pictures was found at Party City, with the exception of the styrofoam cups. I bought those at the Dollar Tree.
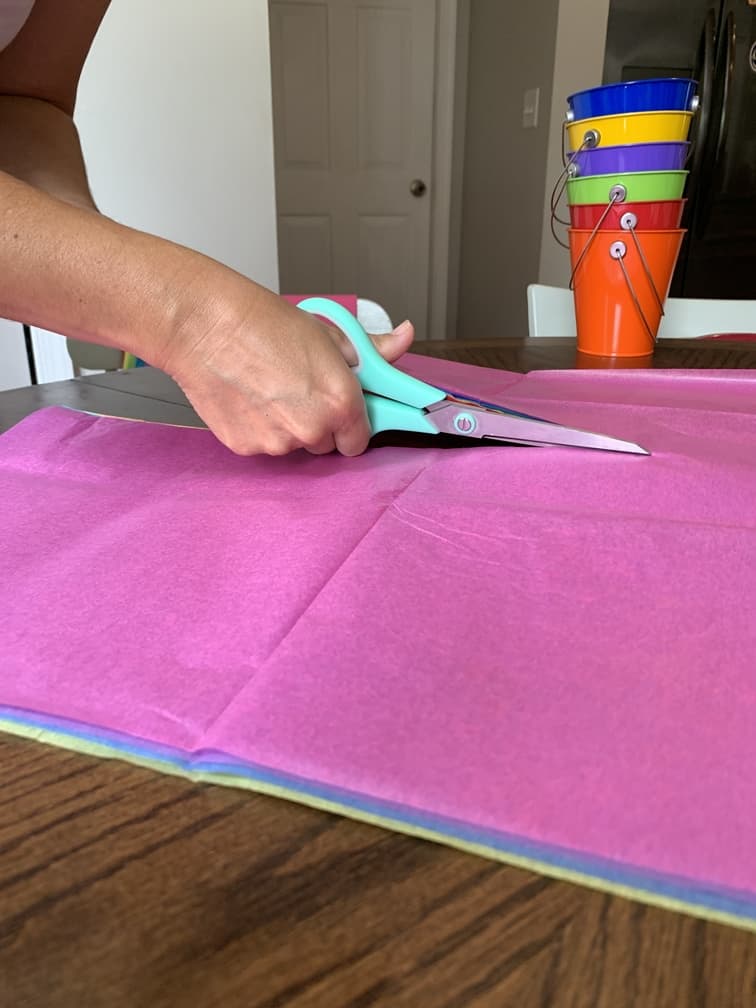
Assembling Your Centerpieces
First you’ll want to lay all of your colors of tissue paper on top of each other to cut them. I used paper that was 20 x 20 inches and I cut them in half and then in half again. I used a 5 x 5 inch piece for the first step then cut the rest in half again to make 2.5 x 5 inch pieces for the second step.

Then, cover the upside down styrofoam cup with a 5 x 5 inch square of tissue paper.
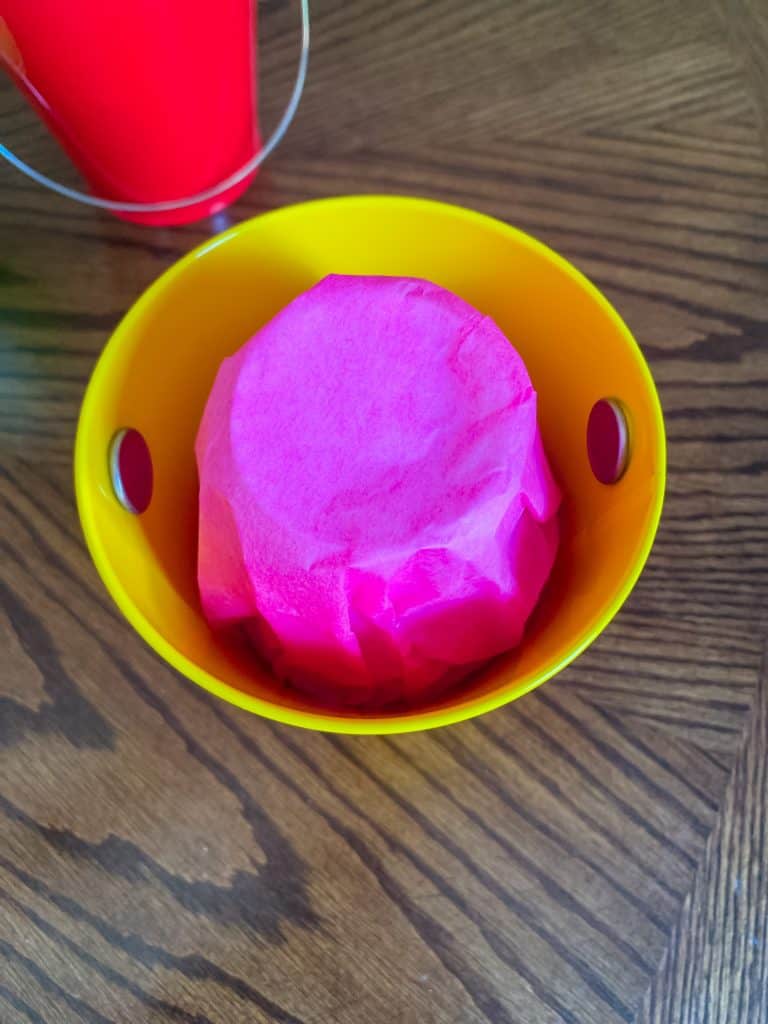
Next, tuck in the ends of the tissue paper square and place the cup inside of the metal bucket.
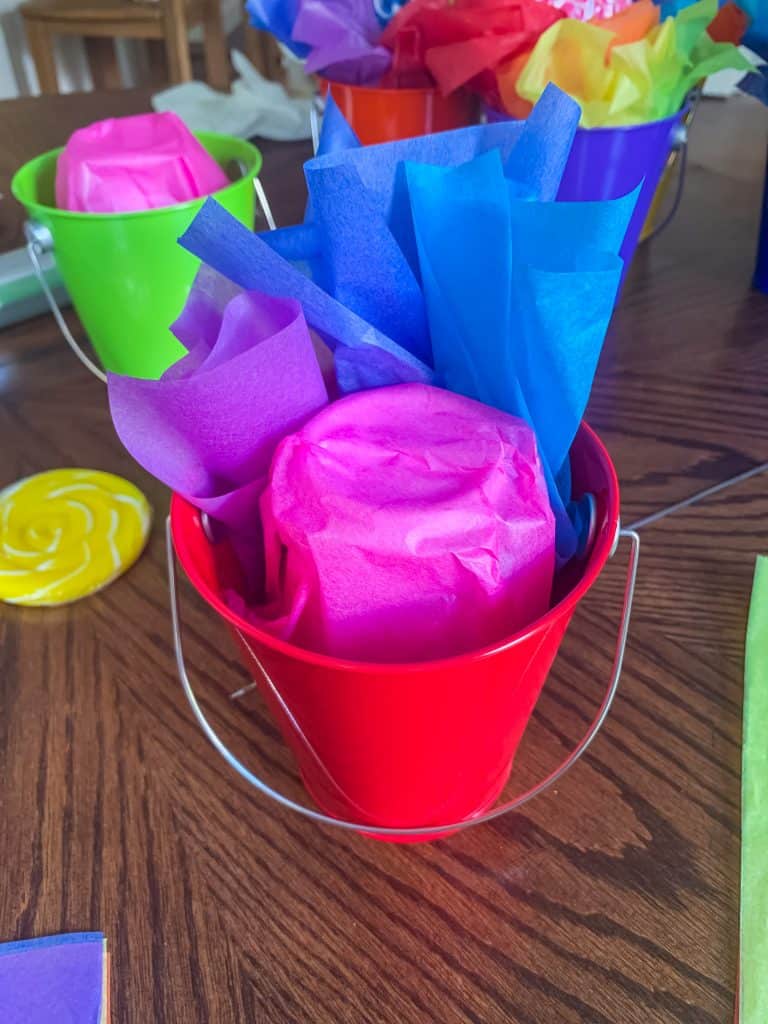

Then take the rest of your 2.5 x 5 inch pieces of tissue paper and tuck them around the cup. Once you have all of your pieces tucked in it helps to really secure them by tucking them in with a rounded object (otherwise they want to jump out of the bucket!).
I used a kabob skewer with a rounded edge which was perfect. I could squish the paper into the bucket with the rounded edge without ripping the paper and then I used the pointy end to poke a small hole in the center of the styrofoam cup for the lollipop.
Poking a hole smaller than the size of the lollipop stick helped to keep the lollipop standing upright. A small piece of foam at the bottom of the bucket would have been really helpful, but I didn’t have any and this seemed to do the job.

There you go! Simple, cute, and versatile. The best part is that these buckets can be used as centerpieces during your party, then you can have your miniature guests fill them with candy to take home as a party favor!

Pin this for later!


5 Responses
Oh my goodness, those decorations are super cute! You would never even guess that they were DIY and much less cheap lol
This is such a cute idea! I love that it’s not only simple, but it also gives you the ability to customize with different colors.
These are so cute! And I love that it’s as simple as going to Party City.
These are such fun decorations! I want to make them with my granddaughter.
So colorful and fun! I would love this if it were my birthday. I think it’s cool for multiple age ranges. And now I want some candy! 😊🍬🍭