15 Minute Pantry Clean Out
There’s just something about the transition from the Christmas season to the New Year that puts the drive in me to make all things new and clean and organized. Wether I follow through or not is another issue, but at least the desire is there. So while I’m feeling motivated, I’m starting with my kitchen. Or more specifically my pantry.
It’s the most frequently opened cabinet, it sees the most turnover of any other space in the kitchen, and therefore gets the most cluttered and crumby of any other food storage space.
So what do you say? You ready to tackle the Great Pantry Clean Out of 2020?
This post may contain affiliate links. That means if you click and buy, I may receive a small commission (at zero cost to you). Please see my full disclosure policy for details.
What You’ll Need
- Cleaning spray and towel – to wipe down shelves and dusty food containers
- Storage containers or baskets – to corral like items
- Masking Tape and Marker – to mark expirations dates of anything you remove from original packaging
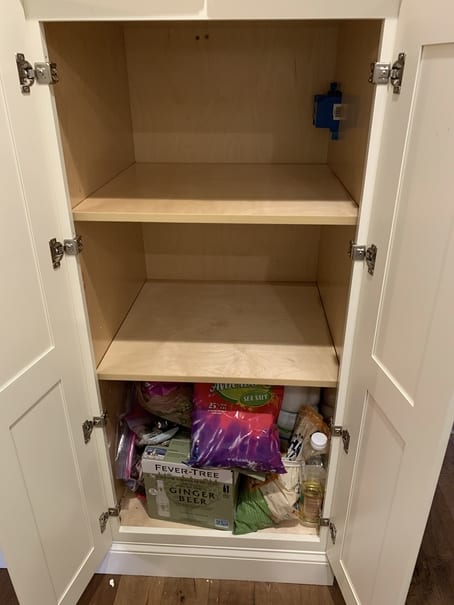
The Before

Here’s my starting point. Looks about how my life after Christmas feels. Cluttered, sad, and a little overweight.
Step 1: Clear off your kitchen counter or island (you’re going to need the space).
Before you do anything it will help to have a clear space to work with where you can sort and organize everything. For me this meant moving everything from my counters to my dining room table, which will inevitably lead to another cleanout of that room. But let’s take this one room at a time, right?
Now that your counter is cleared off, it’s time for Step 2.
Step 2: Take everything (EVERYTHING) out of the pantry and put it on your counter.
This step is really important. Like any Marie Kondo fan knows, this is a really useful part of the process. Not only will it allow you to give your shelves a good cleaning, but you get a clear picture of how much you actually have, and how much of it you need to get rid of.

Step 3: Vacuum and wipe down the shelves
Grab a dust buster and suck up the mound of crumbs that have accumulated over the last few months (or years). Then give each shelf a quick wipe down with a damp cloth (really, where did those sticky patches come from and how long have they been there?).
Step 4: Check expiration dates and toss expired/unwanted food
If you’re like me, you might have a hard time throwing away food, even the stuff you know for a fact that everyone in your family hates. But once I see an expiration date that has come and gone it’s a lot easier for me to say good-bye. You just can’t unsee that date.
Or maybe you have canned food or unopened boxes that you just have no need for? Start a pile to donate to your local food bank. Put everything in a box and place it next to your door. (This is how I make sure that it actually makes its way out the door instead of sitting in the corner of my dining room for months.)
For example, I just found a full case of canned cat food in my pantry from that one time we almost got a cat (long story). But I finally admitted to myself that I will probably not change my husband’s mind about the cat and put the box next to my front door.
A day later and it has already gone home with a friend who actually has a cat. Why that took a year, I have no idea. But having things like that in my line of sight helps me to remember to actually do something about them.
Tip: As you toss things, make a list of items you need to replace.
Step 5: Put everything back.
Categorize Your Food
Instead of just putting things back wherever they fit, try to group items by category. My categories are:
- Pasta/Rice
- Snacks
- Nuts/Dried Fruit/Seeds
- Cereal/Oatmeal/Granola
- Cans
- Baking Staples (sugar, flours, etc.)
- Cooking Oils
- Candy/Sweets
When everything has a place it will be easier to maintain all of your hard work.
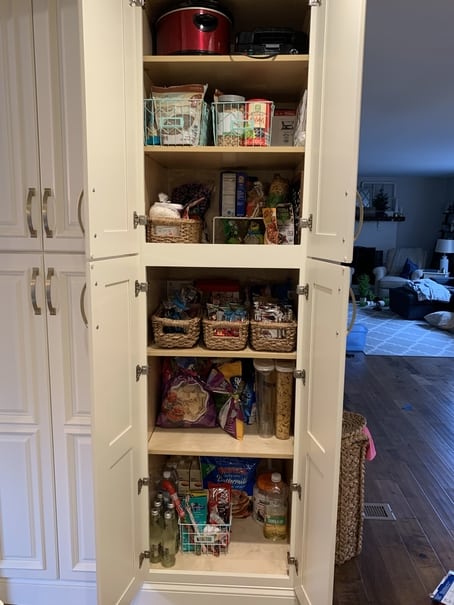
I like to keep snacks and breakfast items at eye level for my kids. The bottom shelf I reserve for bulky things like Costco-sized jars of coconut oil, extra cartons of almond milk and chicken broth, and cases of seltzer/soda that would take up too much room in the fridge.
For added aesthetic value, use matching baskets or food storage containers. You can use any container/basket that you already own. I try to snag wire or wicker baskets when I see them on clearance at Target.
Other great places to check are Dollar Tree and Ikea. I just purchased the baskets in the picture for 70% off at Target so they were around $3.50 a piece.

If you don’t have anything around the house and you want to purchase some useful organizational items, these will get you off to a good start:
Oxo Airtight Container Set – great for pantry staples like flour, sugar, coffee, etc.
Under Shelf Baskets– these help to take advantage of unused space on taller shelves. I have them in the cabinets on left holding boxes of ziplock bags.
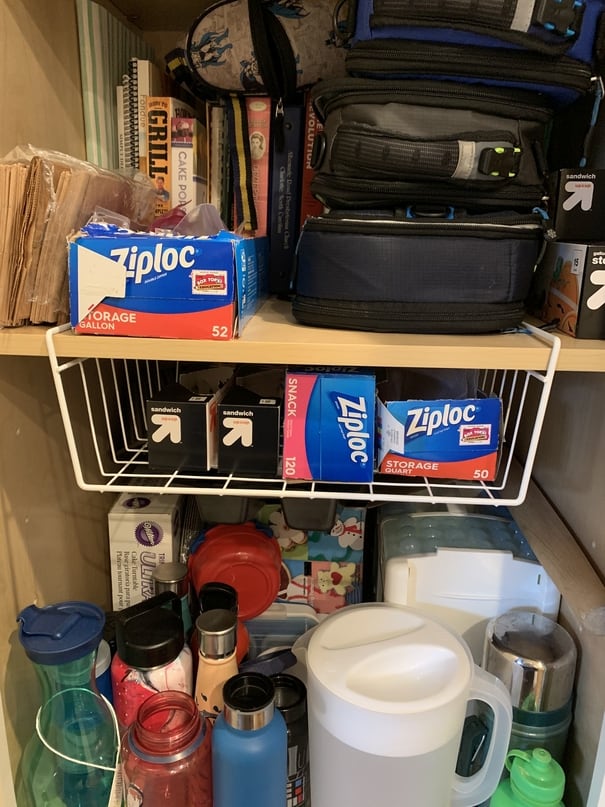
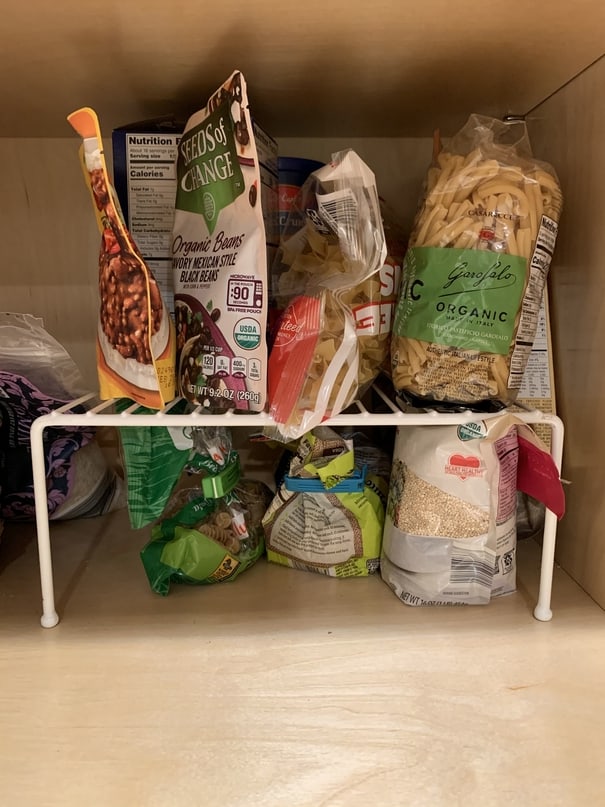
Tip: Take individually wrapped snacks out of the box and put them in baskets with other items in the same category. This is helpful for several reasons.
- No more half empty boxes taking up valuable real estate.
- No wrestling with packaging when you’re on the go. Your kids can quickly grab snacks for lunches, granola bars for breakfast, etc.
- It’s just prettier to look at.
The Finished Product
Listen, I know I’m not winning any awards here, but trust me, it’s so much better! Nothing expired, shelves organized by category, and my most used items within easy reach.
But that’s it! Not so bad, right? Who’s ready to tackle the refrigerator?
Just follow the same set of steps we did here. Take everything out, give all of the shelves and drawers a good healthy cleaning and put things back in strategic places. Simple.
And don’t forget to go back to that pile (or piles) you removed from the counter and sort through that as well. I’m saying this mostly for myself because currently my dining room table looks like this.
Lord help me.

Bonus Step: Make a pantry/refrigerator clean out meal or snack.
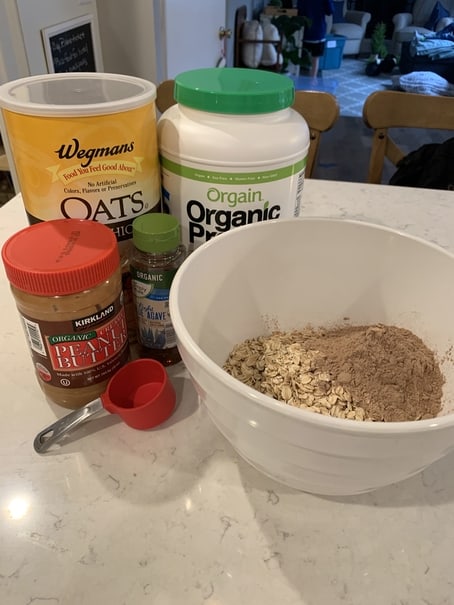
Today I made chicken stir fry with frozen vegetables I had stuck in my freezer last month, a smoothie with a few random dates and chia seeds I found in my pantry, and these really yummy (and healthy) peanut butter protein bites using some about-to-expire chocolate protein powder.
They freeze really well and are great for a quick grab and go breakfast in the morning. I’ll post the recipe soon!

Alright, did you do it? Did you tackle your pantry!? Make a pantry clean out meal you want to share? Take a picture and tag me on instagram so I can see it!
Pin this for later!


2 Responses
Love your tips. After I read this I went and tackle my pantry.
That’s great! Feels good, doesn’t it?